This guide walks you through installing the OpsRamp Kubernetes 2.0 Agent on your Kubernetes cluster. To proceed with installation, follow the below steps:
Step 1: Configure the Kubernetes 2.0 Integration
A. Add the Integration
- In the OpsRamp portal, select your client:
- Navigate to All Clients, then click the Client/Partner dropdown.
- Search for your client name or select it from the list.
- Navigate to Setup > Account > Integration.
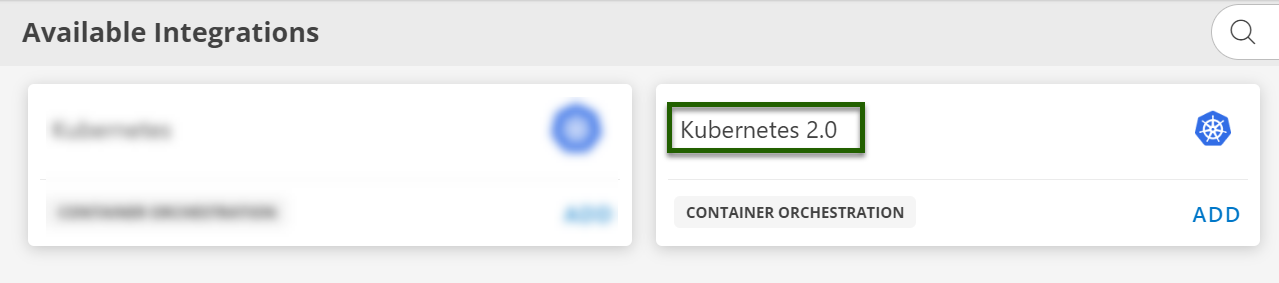
- If you have no installed apps, you’ll land on the Available Integrations page.
- If you have installed apps, click + ADD to open the Available Integrations list.
- Search for Kubernetes 2.0.
- Click ADD and select the latest integration version.
B. Create a Configuration
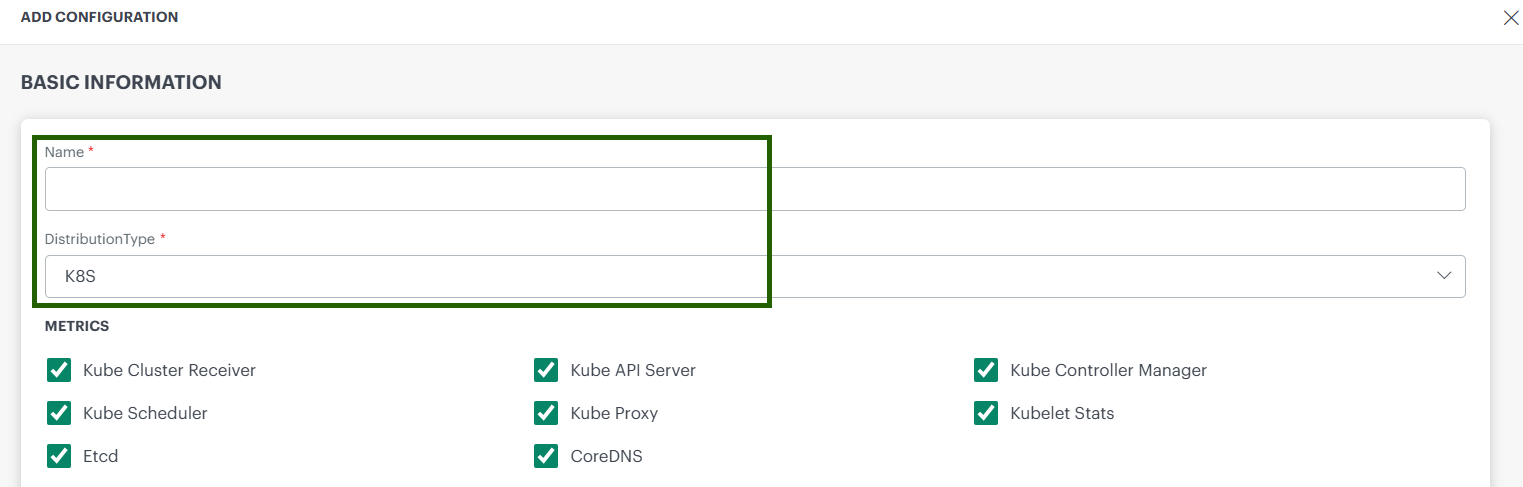
- On the configuration page, click + ADD.
- Fill in the Basic Information:
- Name: Friendly name for the cluster.
- Distribution Type: Select one of the following:
K8S / EKS / AKS / GKE / K3S / MicroK8s / RKE2 / OKD

C. Enable Additional Features (optional)
Enable the floowing supported feature you can enable during the installation of kubernetes Agent:
- Metrics: Choose the required Infrastructure Metric based on your monitoring needs.
- Kube-Events: Enable/disable Kubernetes event collection.
- Logs : Enable log collection from the cluster.
- Traces : Enable tracing and set tracing-proxy replica count.
- Host Network Analytics : Enables deep, real-time insights into network activity across your Kubernetes 2.0 clusters. Ensure you select your container engine from the drop-down list before proceeding.
Note
These features can be enabled either during a new installation of the Kubernetes 2.0 agent or by editing the configuration of an existing installation.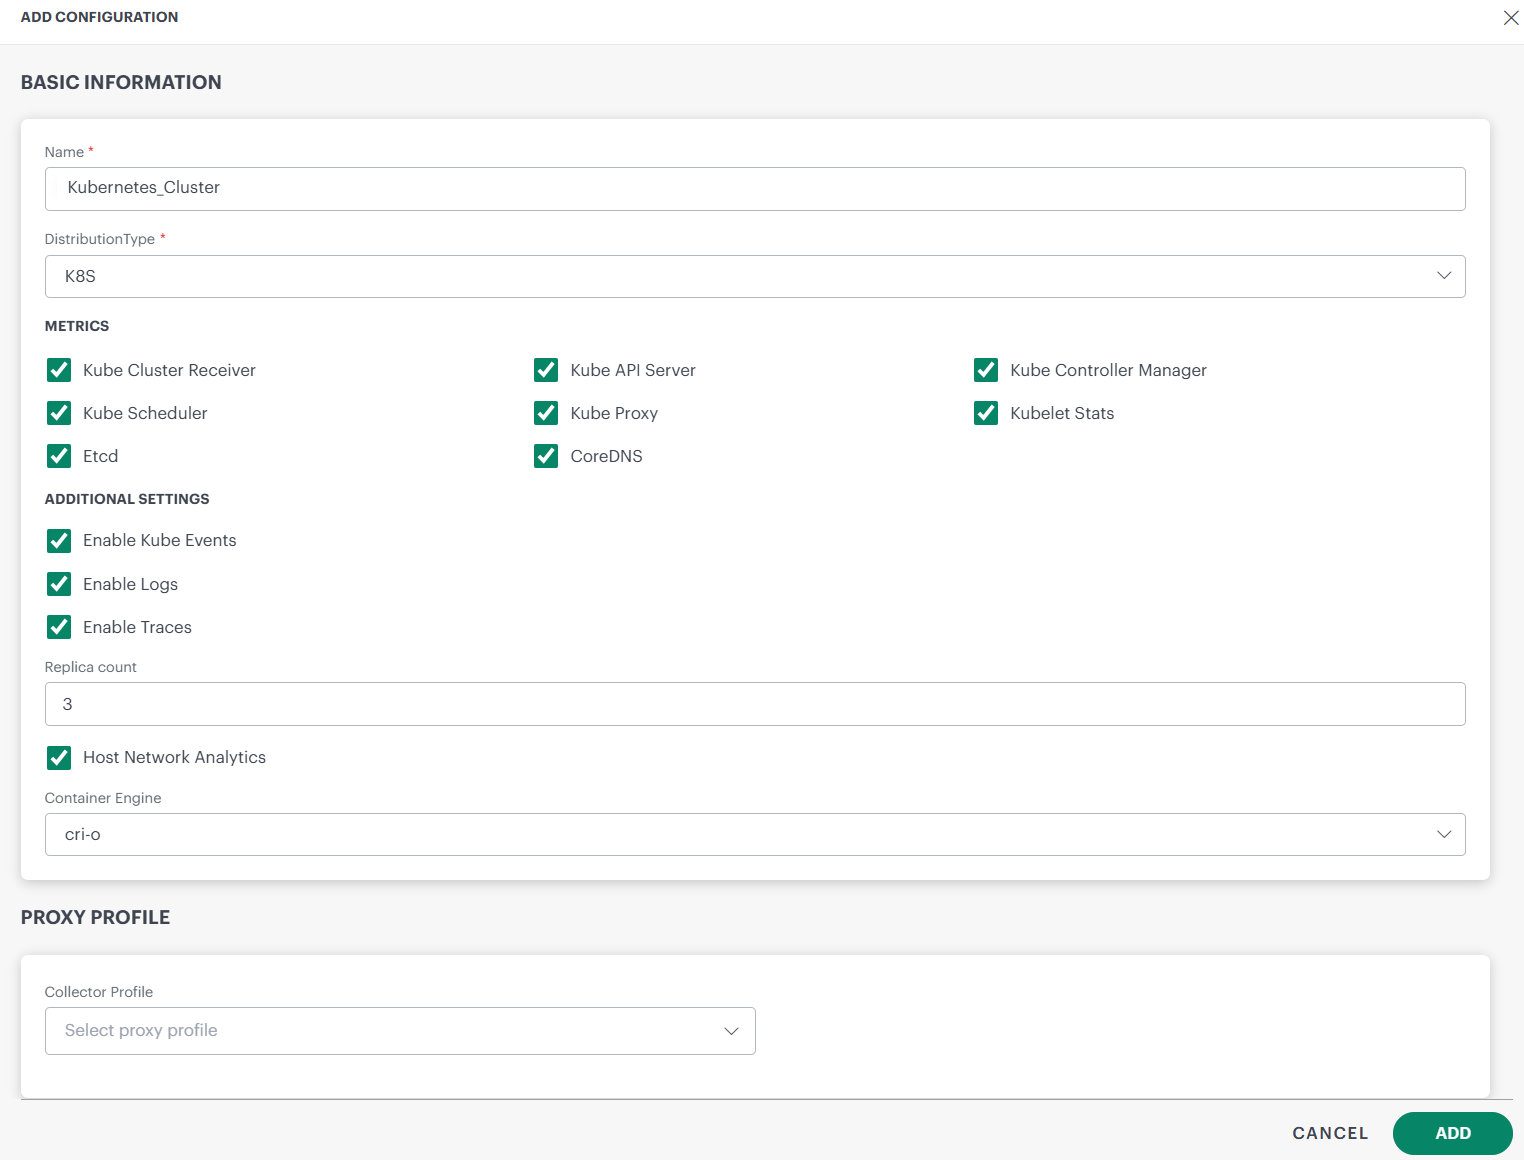
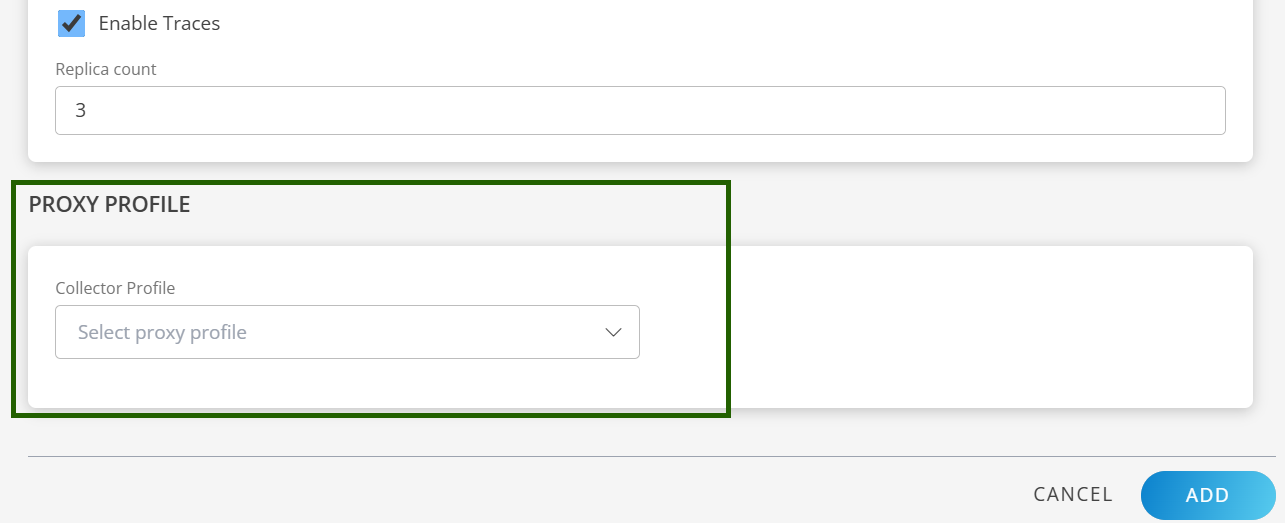
D. Proxy Settings (if required)
- Select the appropriate Collector Profile from the dropdown menu.
- The system will automatically fill in the corresponding IP address based on your selection.
- This setup ensures that the proxy is correctly configured to support Kubernetes 2.0 operations.
E. Save the Configuration
- Click ADD to save the configuration.
- Your new configuration appears on the Configuration home page.

F. Manage the Configuration (Optional)
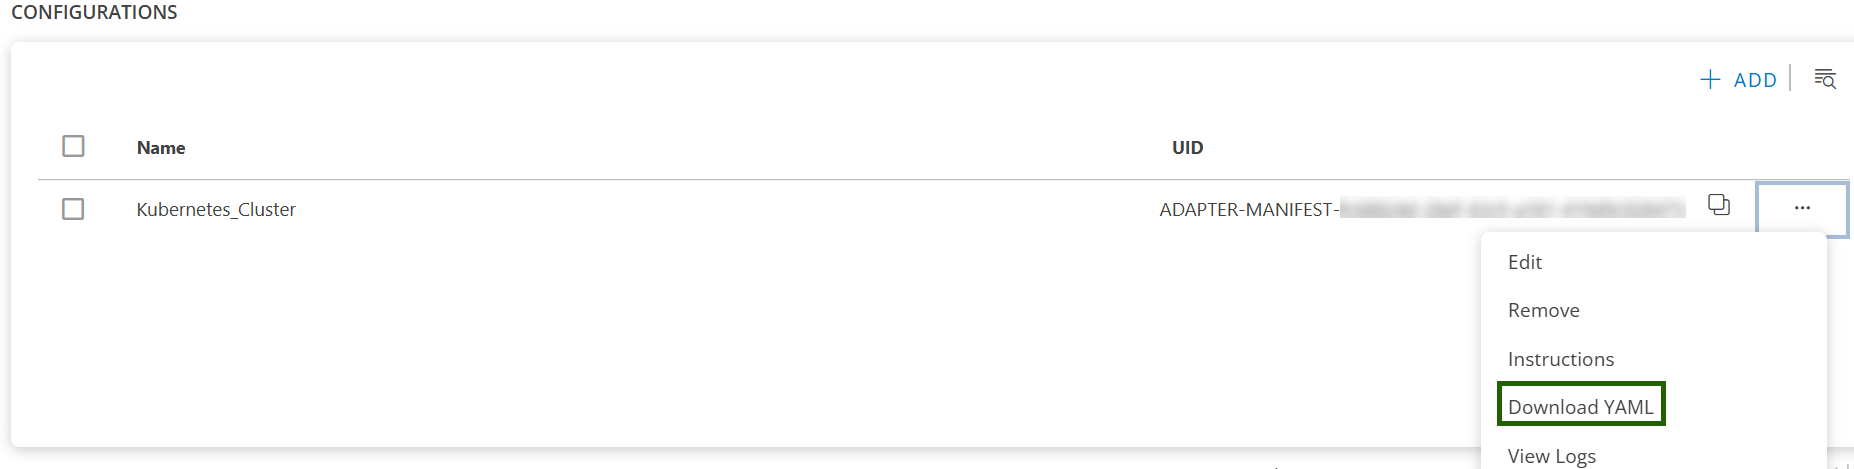
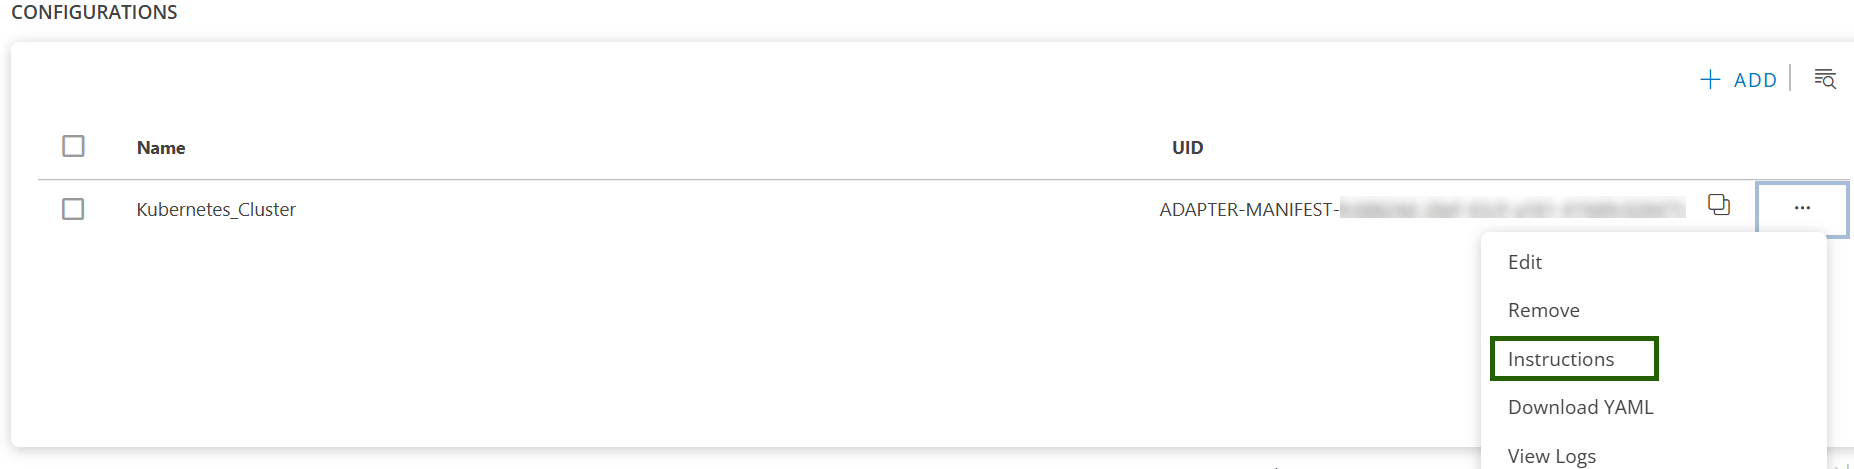
Once the configuration is created, click the ellipsis ( … ) next to the configuration to:
- Edit: Update the existing configuration, such as the distribution type or enable/disable supported features.
- Remove: Delete the configuration and related resources.
- Instruction: View the installation instructions for the selected configuration.
- Download YAML: Download the configuration YAML file.
- View Logs: View the collected logs for the configuration.

Tip
Each configuration is for one cluster. To add another cluster, click + ADD again.Step 2: Get the YAML Configuration File
You can either download the file or copy its contents.
Option 1: Download
- Click the ellipsis ( … ) next to the configuration.
- Select Download YAML.
- The file (e.g.,
opsramp-agent-values.yaml) will be saved to your local system.
Option 2: Copy
- Click the ellipsis ( … ) next to the configuration.
- Select Instructions.
- Click Copy to copy the YAML content.
- Paste the content into a file named
opsramp-agent-values.yaml.
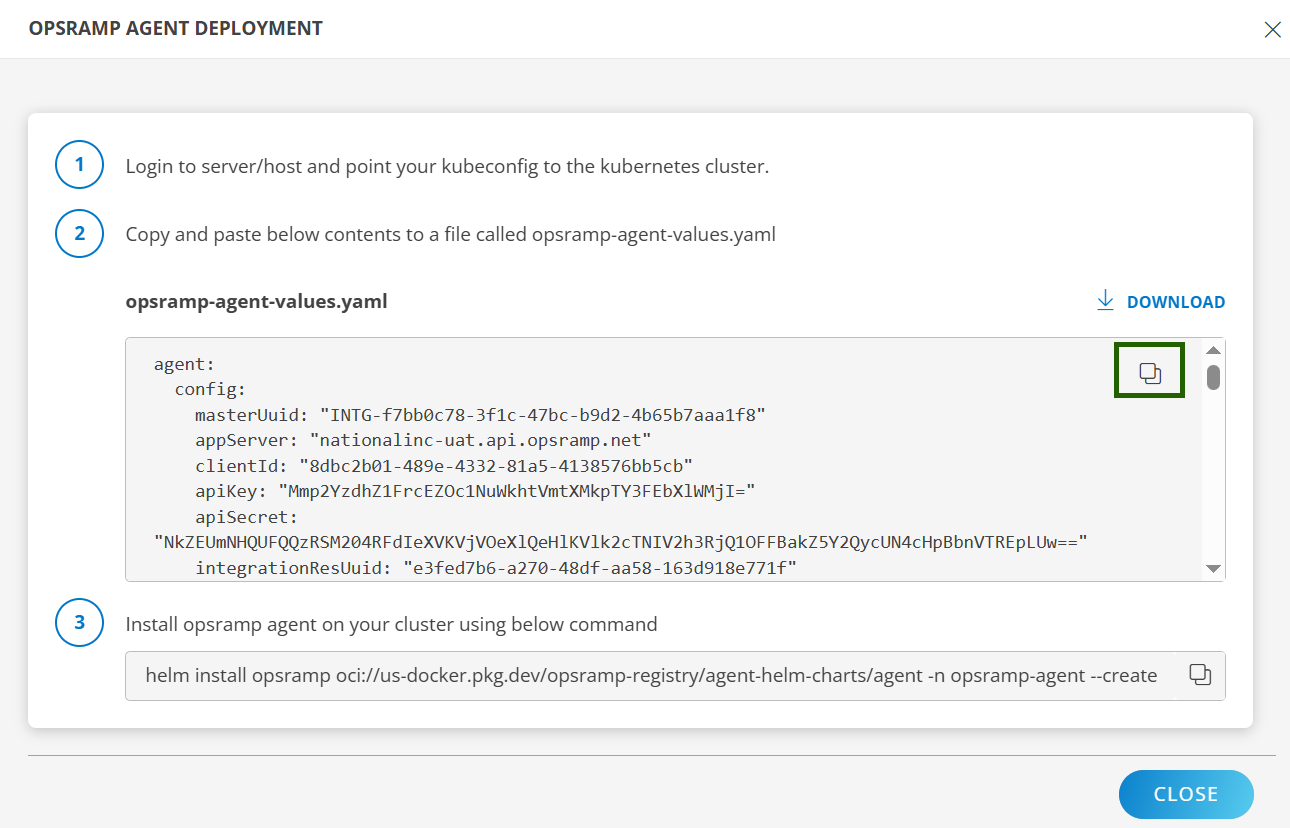
Sample YAML file:
agent:
  config:
    masterUuid: "INTG-<integration UUID>"
    appServer: "OpsRamp API app server https endpoint"
    clientId: "<some client ID>"
    apiKey: "<api-key>"
    apiSecret: "<api-secret>"
    integrationResUuid: "e66995e3-5864-4807-89f9-97330f45a0d0"
    kubernetesType: "<type-of-k8s-distro>"
    enableLogManagement: "TRUE"
    clusterUuid: "<cluster-UUID>"
    clusterName: "<name-of-the-cluster-you-have-given>"
    appConfigId: "ADAPTER-MANIFEST-<app-Config-ID>"
    sdkAppName: "Kubernetes-2.0"
    metricEndpoint: "OpsRamp metric https endpoint"
    metricAuthTokenUrl: "OpsRamp Metric Auth https endpoint"
    logLevel: "warn"
    connectionType: "direct"
    proxy:
      server: ""
      port: null
      protocol: ""
      username: ""
      password: ""

metrics:
  kubeCluster:
    enabled: true
  kubeApiServer:
    enabled: true
  kubeControllerManager:
    enabled: true
  kubeScheduler:
    enabled: true
  kubelet:
    enabled: true
  kubeletStats:
    enabled: true
  kubeProxy:
    enabled: true
  coreDNS:
    enabled: true
  etcd:
    enabled: true
  cAdvisor:
    enabled: true

logs:
  enabled: false
  endPoint: "OpsRamp Logs https endpoint"

kubeEvents:
  enabled: true

traces:
  enabled: true

ebpf:
  enabled: true
  logEndpoint: "OpsRamp https endpoint"

trace-proxy:
  replicaCount: 3
  config:
    OpsrampAPI: "OpsRamp https endpoint"
    AuthConfiguration:
      Endpoint: "OpsRamp auth endpoint"
      Key: "Auth Key"
      Secret: "Auth Secret"
      TenantId: "Tenant ID"
    LogsEndpoint: "OpsRamp Logs https endpoint"
    MetricsConfig:
      Enable: true
      OpsRampAPI: "OpsRamp Metrics https endpoint"
Step 3: Install the Kubernetes 2.0 Agent (Helm)
- Log in to your server or host with
kubectlaccess to your cluster. - Ensure your
kubeconfigis pointing to the correct cluster. - Run the Helm install command using your YAML file path:
helm install opsramp oci://us-docker.pkg.dev/opsramp-registry/agent-helm-charts/agent -n opsramp-agent --create-namespace --values <download-file-path-or-copied-file-path>.yamlNote
The above command is compatible with Helm version 3.2.0 and later.Step 4: Validate the Deployment
A. Check namespace & pods
kubectl get ns opsramp-agent
kubectl get pods -n opsramp-agent
B. Check Helm release
helm list -n opsramp-agentC. Check logs (spot check a pod)
kubectl logs -n opsramp-agent deploy/opsramp-agent --tail=200D. Verify data in OpsRamp
- In the OpsRamp portal, confirm the cluster/resource and metrics are arriving for the receivers you enabled.
- If enabled, confirm Logs, Kube-Events, and Traces are visible.
Troubleshooting
If you encounter installation issues, see the Troubleshooting documentation.